Tuesday, December 6, 2016

Holiday Season

Christmas is one of my favorite times of the year, however, this is a post about the Holiday season, and will apply to you, even if you don't practice the traditions of Christmas.  We live in rural North Dakota, which means a lot of SNOW this time of year.  Today, i'm sitting in my living room, next to my Christmas tree, with my computer, and a cup of Wassail (recipe below) because there's a weather advisory and we're supposed to get another 10-12" of snow.  What do you do under these circumstances?  You appreciate the roof over your head, the heat keeping everyone warm, the food that you've canned, dried, frozen, and stored that will keep your family fed in case you get snowed in, and of course the quality time together, knowing everyone is safe.


One of my favorite things to diffuse this time of year, is Young Livings blend- Christmas Spirit!  It pretty much combines all of the amazing smells of this Holiday, into one bottle!  Orange, Cinnamon, and Spruce create the feelings of happy times, and enhances the joyful moments that are often associated with the Holiday Season.  This blend not only smells amazing, but can also be beneficial in keeping our Immune Systems happy, and healthy!  So, this post is going to be about some ideas on how to use Christmas Spirit in your home and why you won't be able to get enough of it!
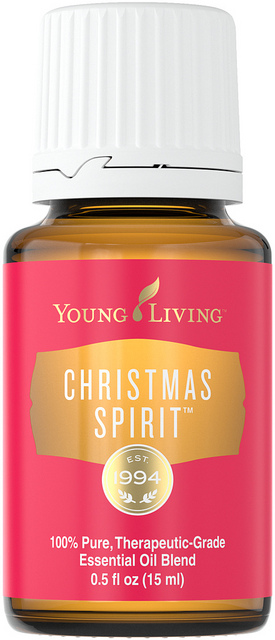

Christmas Spirit Essential OilChristmas Spirit

Combining the simple, nostalgic scents of OrangeCinnamon Bark, and Spruce essential oils, Christmas Spirit™ is the perfect embodiment of the holidays.
  • Create a peaceful atmosphere by diffusing Christmas Spirit anywhere in the house!
  • Give new life to potpourri by adding a few drops of Christmas Spirit. Pro tip: Leave the potpourri in a drawer to gently infuse your socks with its spicy scent.
  • Add a personal touch to your holiday cards by adding a few drops of Christmas Spirit to water, then using the dilution to wet the seal of your envelopes.

I love adding Christmas Spirit to my holiday potpourri containers, it adds a beautiful aroma with no artificial, "scents' or "fragrances".  I usually dump my potpourri into a large metal bowl, add around 10 drops of Christmas Spirit Essential Oil, and then cover and shake throughout the day to really infuse smell into the potpourri.  We have also sealed our Holiday card envelopes with oil infused water, but if you want and extra kick, simply place your cards into a ziplock bag, add 3-5 drops of Christmas Spirit EO onto a cotton round, and seal into the bag.  Let set for 2 days and your cards with be infused with the wonderful aroma!


Once the Holidays are done, and it's time to pack up all of my decorations- this is one of my favorite times to use Christmas Spirit!  I add cotton rounds with 1-2 drops of the oil into all of my totes, bags, containers, etc.  When they're closed up and stored, the smell remains, so next year when you open your containers, you're automatically reminded of the Holiday Season and it brings immediate joy, and excitement for what's to come.


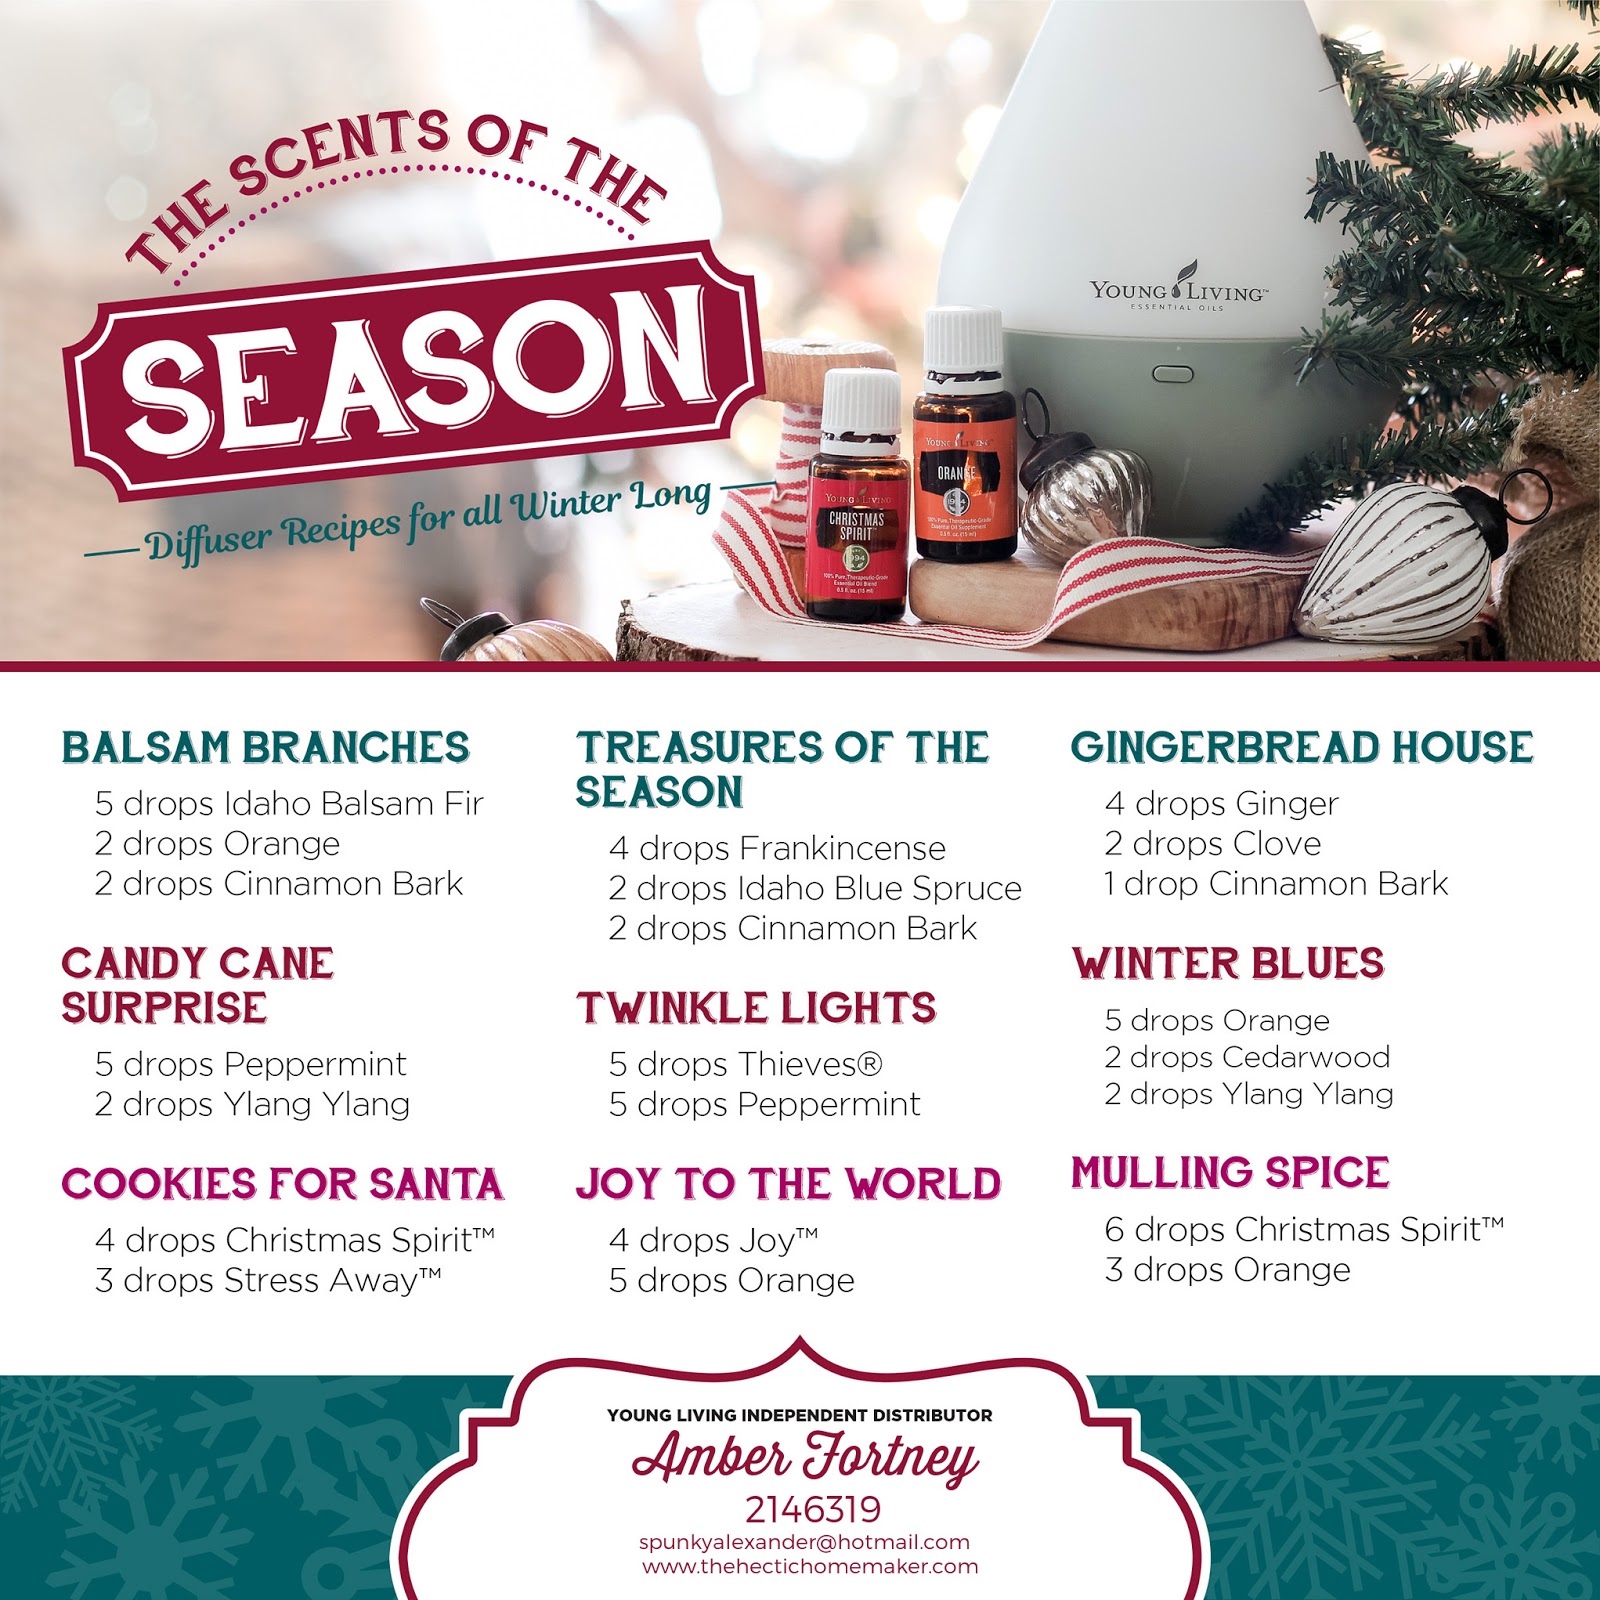
Here are some of my favorite recipes to enjoy throughout the Holiday Season as well! Enjoy...


Wednesday, October 26, 2016


So, it's almost Halloween!  Some people don't celebrate Halloween, but our family is NOT one of them.  In this house, we love to play dress up, decorate the house (with lots of pumpkins and gourds that we grew), and hang spooky spiderwebs almost everywhere.  The kids run around chasing "ghosts", and scaring away monsters- it keeps them busy, and out of my hair!  Sometimes it's fun to escape the day to day routine, dress up like a dragon-or a princess, and rescue the castle!  

Do you know what I don't like about Halloween?  It's the processed, sugar-filled, dye injected, child labor chocolate coated- CANDY!  Ugh, we work so hard to teach our kids good eating habits and then Halloween happens.  Luckily, my kids are still small enough that they don't fully grasp all of the junk that they will get (and will never see again), and are just having fun getting dressed up and decorating the house.  So as parents, what do we do to try and slow down the mass amounts of processed sugar, running through our childrens' veins?  I'm going to share with you some of our favorite ideas and traditions that can keep Halloween fun, while keeping our children's guts a little happier.

First, if you don't want to let your kids eat processed crap- don't buy it and give it to other peoples kids either!  With school parties, trick-or-treaters, and all of the festivities, it can be really easy to just buy a bag of candy and pass it around- DON'T!  For school parties, be creative and send something fun, and cool that the kids will still enjoy.  One of my favorite treats in our house is popcorn drizzled in coconut/peanut butter!  It satisfies a sweet-tooth, has added protein, and is something that everyone likes to eat (unless you have a nut allergy- then you will not like this)!  The recipe is simple and takes only a few minutes.


1.  Add 2T. popcorn into a brown, paper bag- microwave for 2-3 minutes depending on your microwave.  If you have an air popper, or something fancy- please use this method instead! Maybe Santa will drop one off at our house for Christmas so we can stop using the microwave to make our popcorn!

2.  Melt 2T. coconut oil in a small, glass jar.  Add 3T. of PB Fit, 1/2 T. coconut sugar, and 1 drop of Cinnamon Essential Oil.  Stir well, and drizzle over the popcorn.

3.  Sprinkle some Himalayan Sea Salt over the top, and shake until you have a thin coat on your popcorn! DONE

*If someone in your family has a nut allergy, you can make many different flavorings for your popcorn.  Butter & Dill Essential Oil is divine, Coconut Oil and Lime Essential Oil is great, Butter/Sea Salt/Black Pepper Essential Oil is savory and delicious!

*This post contains affiliate links.  You can read my entire affiliate policy here.


Why would I put Essential Oils on my popcorn?  As you may know, there are many amazing health advantages of using essential oils.  You can easily support your Digestive, and Immune Systems, and more, all while enjoying a snack.  I will have to throw in the fact that I only recommend ingesting Young Living Essential Oils, because of their Seed to Seal guarantee.  I know the many health benefits involved and have experienced them first hand.  Just like anything, I highly recommend that you do your own research.  

When using them in cooking, the oils are extremely diluted, and give amazing flavor!  Did you know that Young Living is also the only Essential Oil company to create a whole line of oils specifically to be used as Supplements?  The Vitality line (white labels) are approved for supplemental use, and are an amazing arsenal to add to your healthy living routine.


So, now that you have your popcorn made, what is a really clever packaging idea that the kids will love?  Witch Hands are super easy to make, and very festive for Halloween.

You will need:
*Latex Free, clear, food safe gloves
*Candy Corn
*Twine or decorative ribbon
*Spider rings
*Halloween Gift Tags (there are many free sites that you can print these from)


Simply put 1 piece of Candy Corn in each of the fingers of the gloves to create the fingernail.  Next, fill the glove with popcorn, taking care to get it down into each of the fingers (you might need to crush it a little to get them full).  Then simply tie the glove shut and put a spider ring on one of the fingers to create a spooky snack!


You can make a lot of these for very little time & money so go ahead and get a big cauldron, and fill it up for all of the trick-or-treaters that come to your door.  Some other items that you can throw in are:  Glowsticks, Halloween Pins, Glow-in-the Dark eyeball bouncy balls, etc.


Second, when your kids are done trick-or-treating and have mass amounts of junk that you don't plan on letting them eat- lets get rid of it!  There are a few options to cleverly convince your kids that they don't really want that candy.

1.  Have you heard of the Switch-Witch?  You leave your candy out, she comes and switches it for a cool gift.
This idea is great and we keep it very inexpensive!  


The witch might switch out candy for Halloween things like:
*A book
*Stickers
*Pencils & Erasers
*A new decoration to add to the collection
*Pair of festive socks
*Headband, scarf, hat or shirt (check out the clearance racks after Halloween to find very inexpensive items that you can use in the future years, and just keep some stuff on hand)!  The Dollar Store is another great place to find inexpensive gifts for the witch to bring.

2.  You can teach your kids about the Great Pumpkin!  It's a tradition in our house to watch the Charlie Brown special and you can also buy the book.  At this point you can come up with whatever reasoning you prefer to get your kids to sacrifice their candy to the Great Pumpkin!

3.  The easiest way to get rid of the candy is to throw it away at bedtime and then say you can't remember where you put it.... this option will cause A LOT of DRAMA so be weary of using this method!  You could always tell them that you ate it all, video it, then submit it to the Jimmy Kimmel show hahaha!


Ok, so now you have all of this candy that you convinced your kids to give away!  Now what???  My rule is if I won't give it to my kids- I won't give it to anyone else's kids either.  Normally, we just throw away all of the candy.  Sometimes people will be offended that you would throw away all of that candy, because there are kids everywhere that would love to have it.... Umm, sorry!  The amount of sugar, dye, preservatives, and total CRAP that is in that candy- do you know what it does to your body?  Now, i'm not saying that we're perfect- I will probably end up eating a few pieces and then later regretting that decision, but we're all human.  I'm just trying to do what I know is best for my family, and others.  If you do any research on gut health, processed sugars, artificial dyes/flavors, and the child labor that is associated with many large candy companies, then you will understand why I don't want my children desiring these things.

Anyway, there were a few ideas to help you get through this Halloween season!  I wish you all a night full of surprises, trick-or-treating, dressing up, and a bounty of little ghouls and goblins showing up at your door to impress you with their creative costumes!

Wednesday, May 11, 2016

What's the deal with Turmeric?

Turmeric is a bright yellow spice (from the root), imported from India, that is part of the ginger family, that is also a powerful medicine that has been traditionally used by both the Chinese, and Indians.  The health benefits of Turmeric are numerous, and are new to Western culture, and the holistic health community.  If you are interested in learning more about Turmeric and its many health benefits, then I highly recommend this book.

So what the heck do you do with Turmeric?  Good question!  There are many applications that you can try, but my favorite is to make Turmeric Paste, also known as "Golden Paste".  It has many health benefits and can be super useful in both humans, and pets.  It's a fairly simple process to make and then you can use it in a few different applications.  


Lets learn how to create Golden Paste!  You are going to need the following ingredients to begin:

*1/2c. turmeric powder
*1c. water (have some extra, just in case you need to thin out your paste)
*1 1/2t. ground black pepper or 2 drops of Black Pepper Essential Oil 
      (This is the only Essential Oil that I recommend ingesting, you can learn more here).
      Black Pepper is needed to help our body absorb Turmeric.
*70ml Cold Pressed Coconut Oil
      Adding fats is another way to help our bodies increase the     absorption of Turmeric.
*It is optional to add 1t. cinnamon or 1 drop Cinnamon Essential Oil, to add another flavor profile to your paste.

*This post contains affiliate links.  You can read my entire affiliate policy here.

The process of making your Golden Paste is very quick, and simple.


1) Add Turmeric and water into a small saucepan, and heat gently, while stirring, until you get a thick paste.  This can take between 5-10 minutes.  *If your paste is watery, add more turmeric, and vice versa if it's too thick.

2) Add Coconut oil and black pepper, and allow to cool.  I store mine in a glass jar, in the fridge, for up to 3 weeks.

*NOTE:  Turmeric stains very easily, so be careful about getting it on your countertops, clothes, or white cooking utensils.  I use a metal whisk, and spoon when making my paste.

Now that you have made your Golden Paste, what will you do with it?  I must warn you, that you might not like the taste, it reminds me of curry (and also makes a great addition to your curry recipes)!  Here are a couple of things that I like to make:

GOLDEN MILK!!!! OMG, this is so good, and i drink it at night to help aid in relaxation, and also helps boost the immune system while sleeping.


Ingredients:
2c. Coconut Milk (Can also substitute Almond, Cashew, Soy milks, etc.)
1t. Turmeric Paste
1t. Raw Honey, Maple Syrup, or Blue Agave Natural Sweetener

Instructions:
Blend ingredients in a blender until smooth and now you can drink as is, or you can add 1 drop of Thieves, Ginger, or Cinnamon Essential Oil.

Another option is to pour into a small saucepan, over medium/low heat, for 3-5 minutes until warm, and drink!

SMOOTHIES!!!! Yes, please!  In our house, we love smoothies, and adding Turmeric is a great way to incorporate amazing health benefits.  You can use whatever ingredients that you want, and add 1-2t. of the Turmeric Paste, but here's my favorite recipe.


Ingredients:
2c.  Coconut Milk
1/2c. Greek Yogurt
1-2 scoops of Pure Protein Complete-Vanilla Spice
1 Banana
1-2t. Turmeric Paste
1c. Frozen Fruit (I love white nectarines, but you can use peaches, strawberries, or anything you like)

Instructions:
Blend ingredients in a blender until smooth, and creamy! Enjoy!
*You can also sprinkle some cinnamon on the top too.

Now go and make yourself some Golden Paste so that you can enjoy the delicious, health benefits of Turmeric today!


Wednesday, April 27, 2016

Mother's Day!

The big day is almost here!  Your mother grew you into the person you are today, so what are you going to do to show her how grateful you are?  I used to buy my mom things that I couldn't afford, that I thought she would like.  It's taken me some time to realize that she didn't want me to waste my money on her, and what she really wanted was to spend time with me, or to get a thoughtful handmade gift (think back to making cards in elementary school) that would mean so much more to her!  

Another problem with buying your mom perfume, scented lotions, candles, etc. is that they are full of toxins that could potentially make her sick!  We want to provide our moms with love, and appreciation, so what better way, than to make her some amazing, natural gifts?  Here are some recipes that you can make very easily, and affordably that she will love and that don't contain any toxic chemicals!


If you would like more recipes or to see how to make some other great gifts, you may like to watch this Webinar.  Sherri Griffin and I will teach you 4 quick and easy gifts that you can make for your mother (or a few that you can buy if you don't want to DIY) that will be a big hit without breaking the bank. 

*Mother's Exfoliating Scrub
*Customizable Easy Perfume
*Simple Skin Care
*Chocolate StressAway Bark
*Plus a few of our favorite products

Of course, you don't have to give them all away to your mom-- you can definitely make some Chocolate Bark for yourself. YUM!!! (*This chocolate bark video will play during the webinar, or you can watch it now)


You can also purchase some really amazing gifts from Young Living as well, so here are a few ideas!  I personally LOVE the Art Skin Care System, Deep Relief Roll-On, and the Rainstone Diffuser Starter Kit would be so amazing to receive!


Whatever you do for your mom, this Mother's Day, remember, she only really wants to spend time with you!  You could bring the supplies to her, find all of them here, and make the above recipes together, while enjoying Stress Away Chocolates, and wine! Our mom's are so deserving, and have done so much for us, so don't forget to put some thought, and love into your mom this Mother's Day!

Sunday, April 17, 2016

Oh Crap! Bathroom Spray

Do you still spray air fresheners in your bathroom? Would you rather just smell bathroom stink, or do you like the combo of stink covered by a florally, chemical smell? YUCK! Not only are air fresheners are filled with toxic chemicals that are terrible for our health, but they don’t actually cover up any stinky smells, they try to mask them but it just doesn’t work!  If you are tired of inhaling chemicals and the smell of crap in your bathroom- then it’s time that you make some, “Oh Crap, Bathroom Spray”! I found this recipe in, Melissa Poeppings, Chemical Free Home 2 book, which is also filled with many other great Chemical Free recipes! I changed the oil amounts to customize it to my preferences, which I encourage you to try as well :)
Recipe:
Distilled Water
15 drops Purification EO
10 drops Bergamot EO
5 drops Geranium EO
3 drops Lavender EO

Directions:
First, add EO’s to your bottle. Second, add around 2T. of witch hazel to the oils. Last, top off with distilled water!
*Be careful, and only fill water to the curve of the bottle!  If you overfill it once you put the sprayer on, you will lose your oils and not your water!  Take it from someone who has done this many times!!!

Now you are ready to get rid of those terrible smells in your bathroom, and even better- get rid of those toxic chemicals that are just no good for you! ENJOY :)  You can also use this spray anywhere in your home that there is a bad smell that needs to go!

Here are the links for the other Chemical Free Home books:

Wednesday, March 23, 2016

Laundry Detergent

Hey, i'm so happy to see you here!  This means you are ready to take the plunge and make your own laundry detergent, you're awesome!  Your family is going to be so much healthier and happier without all of those toxic chemicals in their clothes and in the air.  So, let's get to it...


First, gather your supplies!  You will need:
*5 gal. bucket (I like the ones with the screw on lids, like this)
*Small saucepan
*Long handle wooden spoon
*Measuring Cups


Ingredients:
*4c. HOT tap water
*1 bar grated, Dr. Bronner's pure castile soap (I love the Lavender)
*6 capfuls Thieves Household Cleaner
*1 1/2c.  Arm & Hammer Super Washing Soda
*1/2c.  Borax
*2c.  Baking Soda
*3T.  Mrs.  Stewarts Bluing Agent

*This post contains affiliate links.  You can read my entire affiliate policy here.

Directions:
First, grate your bar of soap into the 4c. of HOT tap water.  DO NOT BOIL and stir continuously on LOW HEAT until the soap has dissolved.


Second, fill your bucket half full of HOT tap water, now add your soap solution, washing soda, borax, baking soda, and the Thieves Household Cleaner.  Stir well until all the ingredients are well blended and powders are dissolved.


Next, fill your bucket with HOT tap water, leave around 2-3" from the top of "open space", and now let sit overnight to thicken.


If you can find a helper to stir, great!  Sometimes they are very helpful and will stir your detergent, and then apply Lavender Essential Oil to your foot after they drop the bucket lid on it! :) 


It's the next day!  Simply add the bluing agent and stir again.  Your detergent will be blue for awhile but will turn white again over the next few minutes- hours.  You can use it while it's still blue, it will not harm your clothing.  Now, go ahead and film an empty (washed) detergent bottle half full of  your detergent and the rest of the way with tap water.


*If you don't want to make your own detergent, but want to switch to a natural one, I highly recommend trying the Thieves Laundry Soap, from Young Living!  My container is empty now, so i'm refilling it with my homemade detergent!

Congratulations!  You now have your very own laundry detergent that took you less than 15 minutes to make, chemical free, and for less than $20!  This bucket is going to last awhile, so feel free to share with friends and family who could also make this amazing change!

Now, go do some laundry!  Add about 1c. for Non-HE machines and 1/4c. for HE machines!!! You are going to get around 200 loads out of your bucket if you have a Non-HE machine and a whopping 600+ loads if you have an HE machine!  You're very welcome and I cannot wait to hear about how much you love your new detergent.

*This recipe is based on the Liquid Laundry Detergent recipe, found in The Chemical Free Home book.  Check it out today, for more amazing recipes!

*Tip- You can add your favorite Young Living Essential Oils to the detergent when you add it to the machine.  Ex., I will add 5 drops of Lavender to my children's laundry to give it a fresh, calming smell.

If you would like to become a member of my Young Living Community, I would love to help you on your journey!  Simply, click HERE to get started today.

Friday, March 11, 2016

Empty Bottles? No Problem! Here Are Some Options

What to do with all of your oil bottles, once they're empty? 


Ok, so once you're really, like, really addicted to your oils- you are going to end up with a TON of empty bottles!!! Omg, what are you supposed to do with all of them? You could recycle them, or up-cycle them, which is what I prefer to do! I'm going to share with you the process that I go through to clean, and re-use my empty oil bottles or you can purchase new ones HERE. Here we go...

First Step is to group and clean your empty bottles into the different ways you prefer to use each group (topically, diffusing, internally, etc.). Then you can decide what to make with the little amounts of oils that are hiding inside of your bottles.


*If it's an oil that I use a lot topically, like Lavender, I will just top off with a carrier oil once the bottle is about 1/3 empty. Put on a roller and it's ready to go!  If i'm creating a blend, then i'll simply add other oils to it and once again, top off with a carrier, and put a roller fitment on it! Easy, Peasy...

*I LOVE citrus oils in my daily water so I make a citrus blend that I can drop into my glass water bottle.  I group all of my empty citrus oil bottles (Lemon, Orange, Grapefruit, etc), remove the drop reducers, add water until they are half full, and shake them like crazy.  Then, I simply pour that water into a larger glass bottle with a dropper top. I can add 1-2 droppers full of this citrus blend to my water and it's sooo good!!


*You can easily make a spray such as a linen, room freshening, laundry etc. This example is my Dryer Ball Spray that I use to spritz on my wool dryer balls to freshen my laundry.  I will also use this spray to freshen up towels that have been stored in the cupboard for awhile to give them a nice, clean smell. Typically, I use oils like- Purification, Lemongrass, and Tea Tree. I do the same process as the Citrus water but add a pinch of sea salt to the bottle to help the oils disperse more in the blend. Simply put in a spray bottle and shake before use!


*Another idea is to, make a balm with the last couple of oil drops that are in the bottle and in this example, I'm making a Respiratory Chest Rub (RC, Raven, Wintergreen, Copaiba, etc.).  Simply place some coconut oil in a glass jar and then add your oils, stir with a spoon and now that's done! Next, if they're oils I can also use for diffusing; I will add water to them, shake and pour into a larger bottle that I can then simply add to the diffuser.  I do this several times until the oils are completely gone!

Now, i've just made a Respiratory Rub and also diffusing water!


*For oils that are calming, relaxing, etc. I disassemble the bottle and then put the cap, the plastic dropper part and the whole bottle into a glass jar and add some epsom salts!  Let them sit for a week or so and then you can use these salts for a nice, calming bath (make dad watch the kids so you can actually relax)!  You can get real crazy, and even add the random caps/drop reducers and bottles into your bath too, now they are rinsed off and cleaned out!


*Once your bottles have all of the oils out (I DO NOT like wasting ANY), and you've removed all of the labels, you can put them into a pot with a little bit of Thieves Household Cleaner and water.  Bring to a boil and then turn heat down to simply simmer them for around 5-10 minutes. If there is any gummy residue left, simply use 1 drop of Lemon EO to get the rest of the gunk off! Let them air dry and that's it.


*Now you have clean bottles and can use them to make your own blends.  Give them away to other oily users as gifts for them to create their own DIY's.  If you're looking for Roller Bottles that you can simply purchase, click HERE.  You can order the AromaGlide Roller Fitments and pop those right onto your bottle to roll directly onto your skin. You can find spray tops that also fit these 5ml & 15ml bottles to make your own perfumes and more concentrated sprays.

***FYI: The AromaGlide fitment tops can be used to secure the rollers onto the bottles, or also, to pop them off of the bottle.  Here is the link to watch the "How to" video on YouTube.